Week 2: Garment Draping
This week, we delved deeper into garment draping and focused on understanding techniques that will guide us throughout the module.
Our first practical task was to drape a classic princess line and an armhole princess line. It was both challenging and exciting to see these timeless techniques come to life on the mannequin. I paid close attention to fabric grain lines and alignment to ensure a smooth, accurate drape. Once the draping was complete, we transferred the patterns onto mahjong paper. This step required precision to maintain the design while adding seam allowances and labeling all necessary details.
I thoroughly enjoyed this exercise and gained a deeper appreciation for how foundational techniques can shape the overall design. I’m looking forward to building on these skills in the weeks to come and seeing how they influence my creativity. Thank you Ms Melina for teaching us the fundamental of garment draping technique!
Process of Learning garment draping in class
Week 3: Draping Princess Line
This week, we focused on practicing and refining our princess line draping skills. Using white cotton fabric, I draped on the mannequin, carefully aligning the fabric along the body’s contours to create a clean and structured silhouette. Adjusting the grainline and working with the fabric folds taught me how to enhance the garment’s shape and fit.
Once the draping process was complete, I transferred the markings from the fabric onto pattern paper, ensuring all the seams and allowances were labeled correctly. This transition from 3D draping to 2D pattern-making was a crucial step in understanding the construction process.
I encountered some challenges in achieving symmetry and ensuring the princess lines flowed seamlessly, but with practice, my confidence grew. This week’s work has given me a solid foundation for translating draped designs into patterns.
Week 4: Draping Armhole Princess Line
This week, we completed the armhole princess line draping task. Using white cotton, I shaped the fabric on the mannequin, starting from the shoulder and carefully adjusting down to the waist. It was a meticulous process that required close attention to detail to achieve a smooth, balanced finish.
After completing the draping, I marked the seam lines, grainline, and other essential details before transferring everything onto pattern paper. This step emphasized the importance of precision, as every mark and line contributes to the garment’s final construction.
To test my patterns, I created a basic sewing template and stitched a test garment. This exercise provided valuable insight into how the draping translates into a functional design. The process was both challenging and rewarding, as it deepened my understanding of how draping, pattern-making, and sewing work together to create a finished garment.
Week 5: Exploring Draping Techniques
This week, we began a creative exploration of draping techniques for Task 2. The goal was to select a design—either from research images or our own sketches of final collection—and translate it into a draped garment using white cotton fabric.
I chose one of my final garment design which is an elegant design inspired by sculptural shapes, fabric manipulation and ruffles. I began experimenting with draping the base for the dress on the mannequin and transfer them into patterns on mahjong paper.
This exercise allowed me to push my creative boundaries while applying the technical skills we’ve learned so far. I’m eager to see how this exploration shapes my final design for Task 2.
Cut out draping pieces of Task 2 designs
Task 2 design sketch
Patterns for the base of task 2 design
Week 6: Draping Task 1 submission & exploring draping
This week, I finalized and submitted Task 1 to my times. Task 1 involved creating a draped garment using the princess seam technique. I documented the entire process, including photos of the initial draping, pattern-making, and final garment.
and put them together into ppt slides. In addition to completing Task 1, I continued to refine my draping skills for Task 2. This included experimenting with fabric manipulation techniques to bring more depth and complexity to my designs. It was exciting to see how the fabric could be manipulated to create texture and designs while maintaining the design’s structure. Documenting the process helped me reflect on my progress and identify areas for improvement. It’s been incredibly rewarding to see my growth as a designer through these projects, and I’m looking forward to taking on new challenges in the weeks ahead.
Task 1 submission
Process of Exploring Garment draping Task2
Week 7: Refining Task 2 Draping
This week, I continue with the draping for Task 2! With Ms melina’s guidance, I refined the design, ensuring every detail aligned with the vision I had in mind. Draping the garment required patience and precision, particularly in achieving clean lines and well-placed fabric manipulation.
One of the highlights of the week was Ms Melina taught me how to gather the fabric with the technique called ruching technique and how to make beautiful ruffles for the dress.I struggled to gather the fabrics first as the threads keep breaking but with practice and guidance from Ms Melina I eventually mastered the technique. Seeing the ruffles enhance my design make me feel accomplished. This week has taught me the importance of balancing technical precision with creative expression. I’m thrilled with the progress I’ve made and excited to see how the rest of the project evolves.
Adding ruffles and sewing the fabric manipulation
Week 8: Independent Learning Week
Independent Learning Week provided a great opportunity to focus on my projects and make significant progress and revisioned my work. I finalized final project compilation with all the task requirement, my concept writing, subject matter and also revisions on my work so far.
This week also gave me time to buy all the fabrics and ,materials I need for the final project. I went different fabrics shops that sir JR and Ms Melina recommend me. Then I experiment with fabric choices and consider how different materials could enhance the aesthetic and structure of my garments.
Week 9: Task 2
This week was all about completing the task 2 and documenting the task for submission. After finalizing the draping and sewing all the details, I carefully put it on mannequin and take photos for the submission. It was exciting to see my designs take shape in a three-dimensional form. Exploring the draping task 2 has prepared me a lot for my final collection as I got to design prototype for the one of my final garment and I also got to make patterns and all the necessary techniques and details to bring out my design to life.
Ms Melina also provided helpful constructive feedback on the patterns, helping me refine the fit and adjust some details. This guidance was invaluable and helped me a lot for final project.
Back View & Front View of Task 2 finish result
Week 10: Making Patterns for Final Project
This week marked the start of making patterns for final collection. I used draping technique for all my patterns as it's easier for me to visualize the designs I want to create and it's Ms Melina has taught us so far in garment draping class. I pinned the white cotton fabrics on the mannequin and drape the patterns for the final look. I cut out the draping pieces and finalized patterns onto the mahjong paper.
Melina and JR provided excellent feedback, particularly on how to drape the base of the dress so that I can use my fabric manipulation and sew more practically.
The hands-on process of constructing all the patterns for my final garments was incredibly fulfilling. It was important start of my final collection and and I’m looking forward to continuing this journey next week.
Pattern Making Process for final project
Week 11: Fabric Cutting and Sewing Begins!
This week, I officially began constructing and sewing my garments! I started with my look 2 and 3 together as they both have similar patterns and draping designs. I put the patterns on the silk fabric and carefully cut each piece of the base of the dress, paying close attention to grainlines and seam allowances under guidance of Ms Melina. Once the pieces were cut and ready to sew, firstly I began assembling them on the mannequin to check the overall fit and structure. After that I used the chiffon fabrics to draping and folded the each fabrics to get the fabric manipulation I want. It takes a lot of times and effort to drape each pieces to get the designs I want. After that I started assembling and stitching the pieces together. It was thrilling to see my designs transition from concept to reality.
With guidance from Melina and JR, I experimented with techniques like fabric gathering, ruching technique and draping technique. It has been a lot of work and full of learning opportunities, and I’m excited to see how these techniques enhance my final pieces.
Week 12
This week was dedicated to refining and adjusting the garments I had started sewing on look 2 and look3. I made some adjustments to the dress and I started to add layers of ruffles and manipulated ruffles fabric into flowers just like how Sir JR suggested during the fabric manipulation samples tasks. It improve the fit and design details of my final look. Melina’s advice on seam allowance adjustments was particularly helpful in achieving the dress that fit the measurements.
One of the challenges I faced was handling the satin silk fabric and draping as the fabrics are really soft and easy to make mistakes. It's really challenging for me to sew the silk and draping together as they keep shrinking and wriggle. It's also challenging to ensure symmetry in the design, especially with complex elements like draping and ruffles. After several trials, I managed to finish look 2 and half of look 3.
Week 13
This week, I continued to sew and finishing my look 3. The process of sewing and adjusting after so many trials has taught me the importance of patience and attention to details. Each step brings me closer to completing my final collection. I continued to explore with ruffles and adding flower details to the dress to finalize the design of look 3. This allowed me to incorporate unique textures into my designs and elevating their aesthetic appeal of my final collection theme.
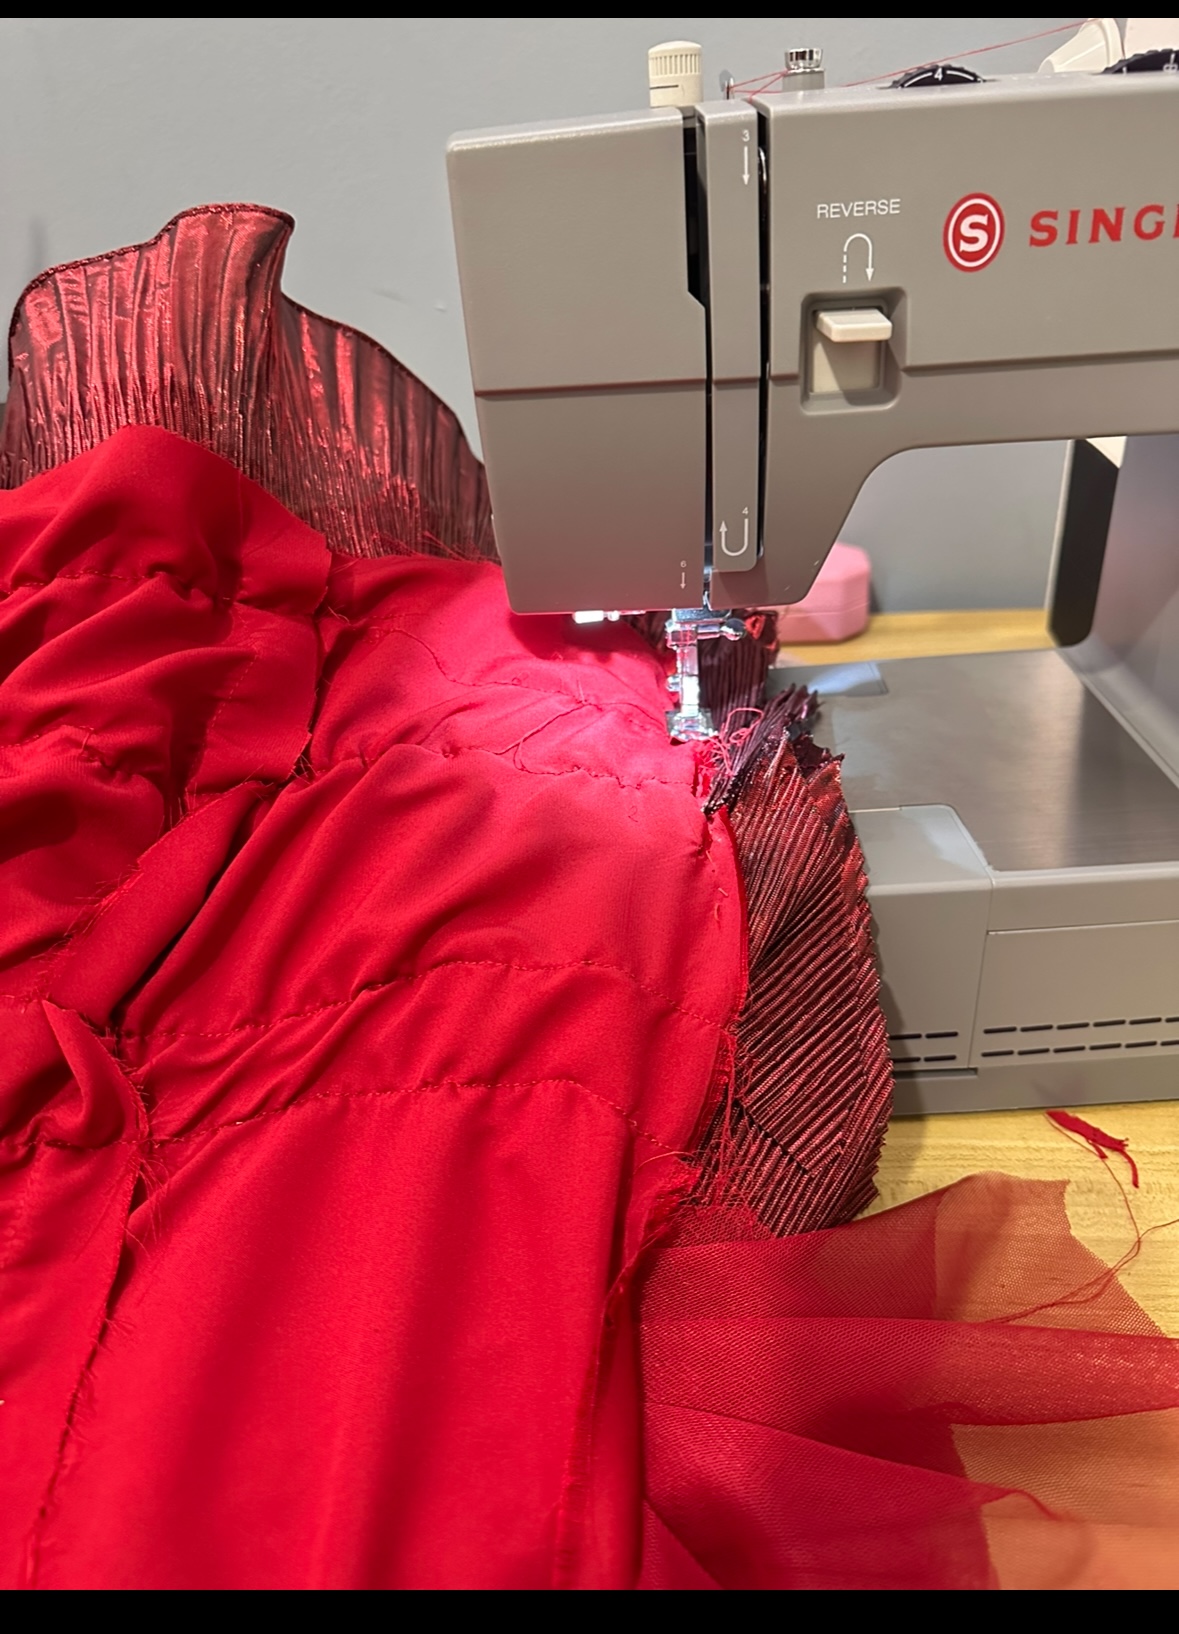
In addition to embellishments and finalizing the look 3. I continued with construction of look 1. Just like how I did in look 2 and look3. I cutted out the patterns and make sure of all the grain lines and seam allowance. This time I used red satin silk according to my designs . and I continued with draping red tulle fabric on the cut out pieces and created uniqued fabric manipulation I wanted to design for my final look. And then I continue with sewing the remaining pieces of my look 3.
Week 14
Despite it being the holiday season, I stayed focused on refining and finishing sewing my designs. I made adjustments to the measurements according to my models body size and continued to sew ruffles and adding embellishment details to my look 3.
I also bought the red heels, lace tights and gloves for the styling of my final looks and bring out the aesthetic of my final collection.
This week has been all about problem-solving and adjusting all the details and I’m feeling much more confident as I approach the final presentation.
Week 15: Final Presentation
The final week is here! January 3, 2025, marked our final presentation day. However, I couldn't go to present that day because I got sick and feeling severe stomachache. I informed Sir JR, Ms Melina and Ms Maria about my situation and thankfully they give me extension for final presentation which is on Jan 7. It was an
exciting and nerve-wracking experience to showcase all the hard work and growth from this semester.
During the presentation, I was really nervous as one of my outfit doesn't my current model and it's too loose. There's some error and mishaps in my garments but I tried my best with the support from my mentors Sir JR and Ms Melina. Thanks to them I managed to present my collection and can walked through my presentation process. The feedback from my instructors and peers was incredibly rewarding—they appreciated the techniques I incorporated, especially the draping and the fabric manipulations.
A special thank you to Melina and JR, whose guidance and support throughout this module have been invaluable. They pushed me to think critically, explore new techniques, and refine my craft.
Looking back on this semester, I’m proud of how much I’ve learned and grown as a designer. From mastering foundational draping techniques to creating a collection that reflects my personal aesthetic, this journey has been both challenging and inspiring. I’m looking forward to applying these skills to future projects and continuing to evolve as a fashion designer.
Self-Reflection on the Garment Draping Module
As I reflect on my journey through the Garment Draping module, I feel a deep sense of accomplishment and gratitude for the experiences, challenges, and growth I’ve encountered. This module has not only enriched my technical skills but also broadened my creative perspective on garment construction and design.
Starting with foundational techniques, such as marking the lines and bias cutting, I gained an appreciation for the precision and artistry involved in draping. Learning to manipulate fabric on a mannequin, understanding grainlines, and transferring 3D drapes into 2D patterns provided me with invaluable insights into the seamless transition from concept to creation.
The module also taught me the importance of attention to detail and patience. Tasks like princess seam draping, pattern drafting, and sewing required meticulous focus, while problem-solving during fittings and adjustments pushed me to think critically and creatively. I found immense satisfaction in seeing my designs come to life, from initial sketches to fully realized garments.
Moreover, the guidance and feedback from Melina and JR were really helpful in my development. Their expertise and encouragement inspired me to experiment with different techniques which elevated my work.I'm really grateful for their teaching and guidance throughout the semester.
Looking ahead, I’m excited to apply these lessons to future projects. I feel more confident in my ability to create innovative designs while honoring the craftsmanship and techniques that make them exceptional. This journey has been both humbling and empowering, and I’m eager to continue growing as a fashion designer.


Comments
Post a Comment